An estimate is the core document in Estimation Builder — it captures the job details and the line items you're quoting, and it's what you turn into a PDF for your customer (and later, an invoice). Here's how to create one from scratch.
Start a new estimate
From your Dashboard, click New Estimate. (You'll also find a Create New Estimate button at the top of the Estimates page.) Every estimate belongs to a customer, so the first thing you'll do is choose who it's for.
Pick the customer
On the Customer For Estimate screen, pick an existing customer and click Continue — or click Add New Customer to create one first. If you add a customer here, Estimation Builder saves them and takes you straight to the estimate form for that customer, so you don't lose your place.
Fill in the estimate details
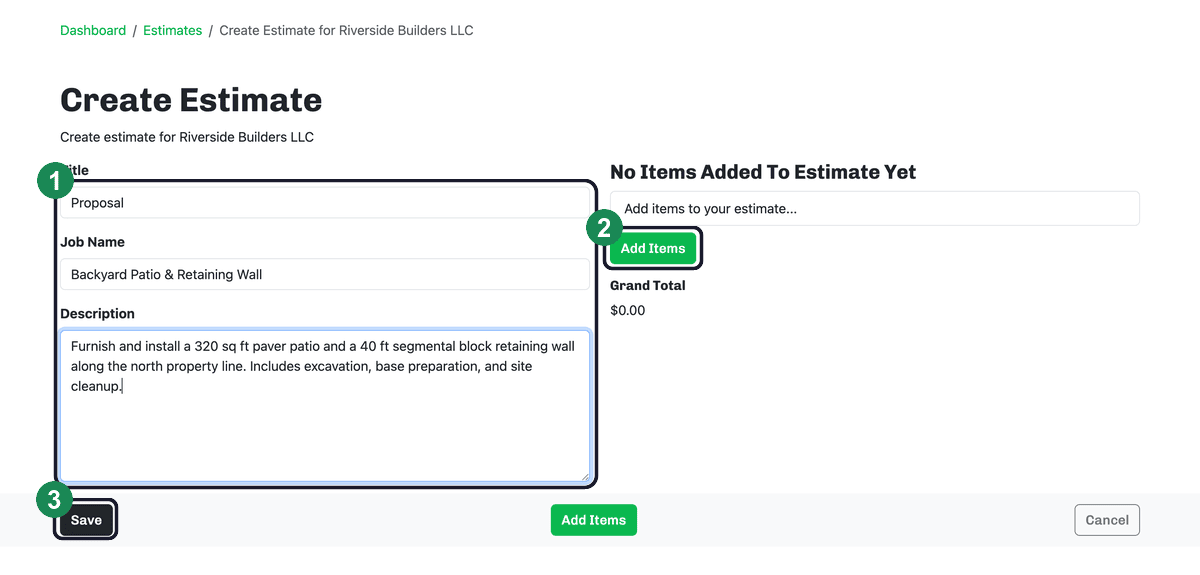
- Title — the heading that prints at the top of the PDF (for example, Proposal).
- Job Name — a short name for the project, like “Backyard Patio & Retaining Wall.”
- Description — the scope of work in your own words. This prints on the estimate, so write it the way you want your customer to read it.
Title, Job Name, and Description are all required, and you'll need at least one line item — Estimation Builder will let you know if anything's missing when you try to save.
Add your line items
Click Add Items to start pricing the work. Each line item can be charged by square foot, cubic foot, quantity, flat rate, per foot, or per hour, and the Grand Total updates as you add them. For the full walkthrough, see Adding line items.
Save the estimate
When you're ready, click Save. Your estimate is created and appears on the Estimates page, where you can generate a PDF, send it for signature, accept it, or turn it into an invoice. For what comes next, see Generating the estimate PDF and Estimate statuses.